Tuesday 30 October 2012

Roundhouse Objects Conservation - Oct. 30, 2012

October 30, 2012

Cleaning Ceramics

With the assessment of the roundhouse objects completed and approval from the curator to proceed the next step is to do the cleaning.  I have concentrated on ceramics in the first phase of cleaning.  In general the ceramics are part of the railway dining car sets that were broken or disfigured and then thrown away.  The cleaning is done in several steps as follows by using:
  1. a stiff brush such as a smaller art painting brush to brush away the loose material,
  2. a wooden pick with a sharp point such as a shish-kabob stick to dislodge dirt from crevices,
  3. a tooth brush to dislodge any more stubborn material,
  4. a soft cloth dipped in soapy, distilled water to wipe off stains, soil,
  5. a second soft cloth to rinse with distilled water.
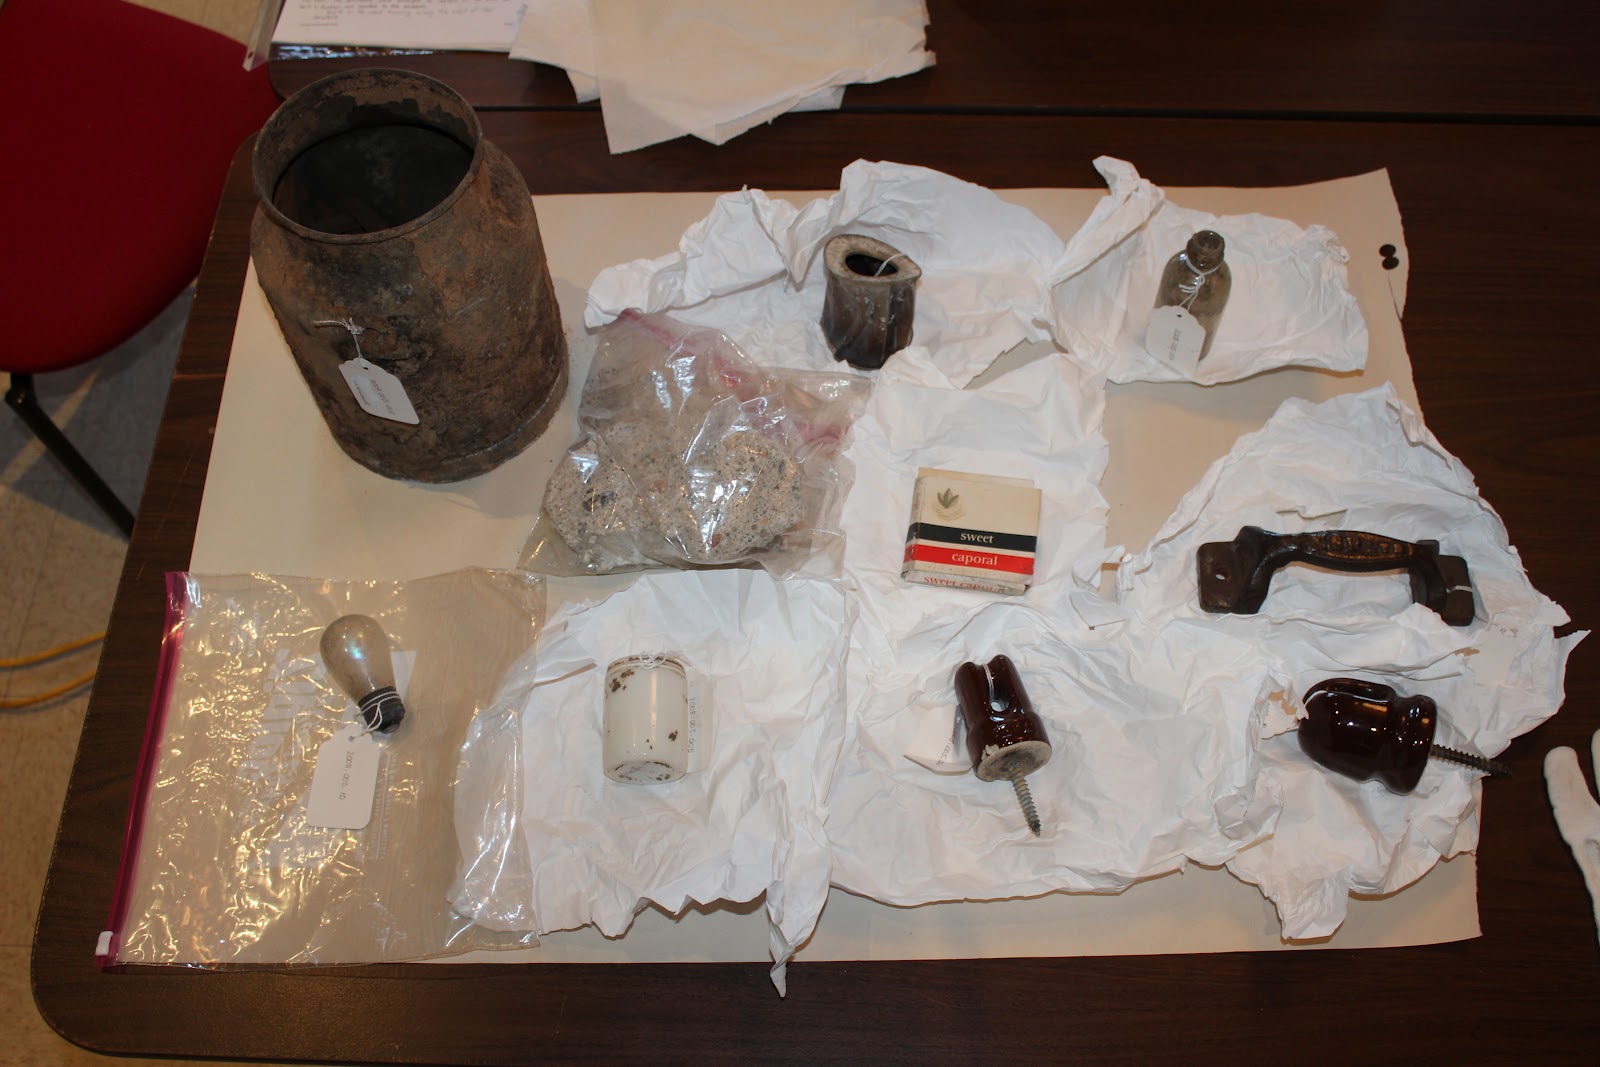
Conservation Tip:  Be very careful when cleaning to avoid any damage to the makers mark or a registration number often found on the bottom of ceramics such as cups, bowls or plates.  It is best to avoid these to ensure that they will remain readable.  This is also true for all historical objects with any identifying marks such as the owner's initials, signature, and so on which can be found in paper, cloth, leather, glass, and so on.  Any loss of readability is to be avoided since the marks often assist in determining dates, history of use, owner, and/or maker of an object.  The ceramics we cleaned had identifying marks which we left alone as shown in the photograph below.  The makers mark in this case was applied before it was glazed and fired so it is stable but the registration number was added later and is somewhat fragile.

Makers mark in the centre
Registration number in black ink below it
Photographs are taken of all objects before and after with a scale and a label to record the removal of material.  All work is done using gloves and on a base of plastic to control moisture.  The soap is the same one used to clean mouldy textiles - Orvus.  In all cases we were able to remove most of the soil and what looked like rust stains.  Some would not come off with minor amount of pressure so were left as is.  Below are photographs showing before and after with this type of cleaning.  Please note that only a small amount of material was removed in this example as found around the outside edge of the base and around the handle while some of the red marks also came off.

Ceramic cup before cleaning
Ceramic cup after cleaning with
soil bits removed shown on lower right
The following photograph shows three cups that were part of a package that came together.  It shows the tools and materials used to do the cleaning and they show what is an interesting progression of deterioration from the worst to the best.  The coloured band around the upper part of the cup is the best illustration of this - if you look closely at this band in the line up of cups at the top of the photograph you will see how the colour goes from almost completely faded on the left hand cup to bright, vibrant colours on the right.  This begs many questions in terms of the amount of time these objects spent exposed to the elements: whether they were exposed to more or less sun, the effects of soil on the coloured parts, and so on.    Was it exposure to sunlight that faded the colours or exposure to soil or a combination of both?

Tuesday 23 October 2012

Treating Mouldy Objects - Completed - October 19, 2012

October 19, 2012

Immediately after carefully cleaning and rinsing, the objects treated were hung up outside to dry in the sun for the rest of the day (from 10:30 Am until 3:30 Pm).  Once again, we moved them to follow the direct sunlight since there were shade trees nearby.  When they were brought inside all except one felt dry to the touch.  We did put them out in the sun the next day as well to complete the drying process.  In all cases they were dry to the touch including in all the out of the way places we checked (around folds and peaks on the inside).    Although all visible signs of mould no longer appear we will continue to check them on a regular basis (at least monthly) to ensure there is no additional mould growth.  The black leather gloves continued to have a musty smell which was likely just absorbed due to proximity with the other objects.

The silk insert inside one of the objects was left to dry inside and was dry to the touch by the end of the day. Below is a photograph of the insert showing it removed for cleaning.  The silk is stitched onto a paper backing.  The paper appears to be from a newspaper.

Kings Canadian Hussar's ceremonial hat silk insert 
The objects were all wrapped in acid free paper, stored in banker's boxes, and put away in the museum storage.  A regular check will determine if we have removed the problematic mould infestation.  After several months without evidence of mould growth it would be acceptable to put these objects in with others as part of an exhibit.

Conservation Tip: There are several methods that can be used to remove or reduce the musty odours found on leathers, textiles, and papers .  None of which are guaranteed but might be worth the time, cost and effort.  The best and lowest cost alternative is to place the object in direct sunlight preferably with a breeze.  The sun's ultraviolet light actually will help to break down what is causing the smell.   Keep in mind that some materials will fade with too much sunlight so be cautious and try only a few hours in the sun at first.  Consult a conservator if you are not sure.  Something else you can try which may just reduce odors without having a major effect on what causes them (another lower cost alternative) is storing the objects for a longer period of time in an enclosed container with known odour absorbing materials such as baking soda, charcoal briquettes, or kitty litter.  The objects must not directly contact the odour absorbing materials so put them in an open container inside a larger container that can be closed.  Open it up from time to time (perhaps, weekly?) take the object out and see if the smell is reduced.  It could take several months and is not guaranteed.

Treating Mouldy Objects - Cleaning - October 18, 2012

October 18, 2012

Carefully cleaning the objects to remove any additional mould spores after hanging outside in the sun involves using a soap such as Orvus (similar to Woolite) mixed with distilled water to wash the objects and then rinsing at least twice with distilled water alone.  Washing and rinsing should remove the rest of the mould spores that could be lurking in the materials of the objects.  Damp wiping with a natural sponge dipped in the soapy solution and squeezed to remove most of the moisture will ensure the object is not overly wet.  Do the same when rinsing but use different sponges: a soap sponge and a rinse sponge.  I was very careful with the one object that had several different coloured materials on the inside by using a separate, smaller sponge for each colour.  Testing for colour fastness showed some removal of the colour when rubbed aggressively in non-obvious location with a Q-tip soaked in distilled water.  Being very gentle with the sponge and using different sponges for each colour showed no colour removal.

One of the hats treated has an inside silk insert that was cleaned and rinsed by dabbing with a damp cotton ball.  Since silk is very fragile a wiping motion may have been harmful to the material.  In this case the silk is sown onto a page from a newspaper so I avoided getting it wet.  Excess moisture has the potential to stain the paper.

The first photograph below shows the damp wiping and rinsing in progress.  You can see some of the white mould concentrations on the hat that were removed in this process.  The second photograph below shows the dabbing of the silk insert.

Damp wiping off mould spores with natural sponge
Dabbing silk insert with a cotton ball


Conservation Tips: 1) It is best to immediately hang up the objects again in the sun to dry them out as soon as possible.  Since moisture can reactivate dormant mould spores it is best to thoroughly dry them out right away.  2) Soaps such as Orvus are used because they are more pure than regular soap meaning they are less likely to react negatively with the materials you are washing.  3) Test for colour fastness before washing.  4) In this case (hats) damp wipe instead of immersing them fully in the soapy solution.  There are some cases where a full immersion is warranted.  5) Use natural sponges because they are less likely to have impurities that might affect the materials you are washing.  6) Always wear gloves and a mask plus clean all the tools, containers, and brushes with bleach right after you are done.   The gloves and sponges were thrown away.

Monday 22 October 2012

Treating Mouldy Objects - Brushing - October 17, 2012

October 17, 2012

Sadly, two of the hats were in very bad shape with a lot of mould visible.  After careful consideration, advice, and discussion it was decided to deaccession them and concentrate on saving the rest of the objects.  These were from the second world war and would have been very difficult to clean.  Some of the reasons why they were removed is: 

1) there are already examples of these within the museum's collection,
2) it is especially difficult to remove large concentrations of mould without damage to the object,
3) the mould has already caused damage,
4) fur on the hat at the bottom is difficult to clean.  

Below is a photograph of these showing their complex nature and the heavy concentration of mould.

Hats deaccessioned (thrown away) due to mould damage

The objects to be treated consist of the following:
  1. Kentville Police Chief's hat circa 1950-1960's
  2. Kings Canadian Hussars dress cap circa 1900
  3. Junior Officer's service cap circa 1972
  4. Kings Canadian Hussars wool service cap 1904 - 1939
  5. Royal Canadian Navy sailor's cap 1941 -1945
  6. Swagger Stick 1950
  7. Black leather gloves circa 1920's   
The first step in treating mouldy objects is to put them into direct sunlight preferrably on a windy day.  The sunlight will help to kill the mould spores while the wind will help to dislodge and carry away the loose mould spores.  The second step is to brush the objects with a small paint brush that has medium soft bristles to help dislodge the mould spores.  Mould spores naturally occur in our environment and are normally all around us so all we are doing is removing concentrations of them on these objects.  It is the concentration of it that cause harm to the objects especially fragile textiles.  In the photograph below this hat and the long leather gloves were the only objects that had visible concentrations of mould spores but we treated all of the objects stored together with them.

Conservation Tips: 1) Do not put silk objects or any part of an object that is silk into direct sunlight.  Sunlight and many other sources of light has a cumulative effect on silk and will accelerate its breakdown over time. 2) As shown in the photograph below wear a mask, gloves (latex or rubber), and do not put objects anywhere near air vents or open windows into a building.  3) Clean all objects in any group stored together where one or more show evidence of mould spores.


All the objects were carefully hung up on a line in sunlight for the whole time that the museum was open and were brushed a second time later in the day.  The line with objects had to be moved along to follow the sun due to shade produced by trees.  Here is a photograph of the objects being hung up with clothes pins.

Friday 19 October 2012

Treating Mouldy Objects - Planning - October 17, 2012

October 17, 2012

Several objects stored in the Kings County Museum started showing evidence of mould growth.  This was discovered by the curator and immediately dealt with.  The curator inspects objects at least twice every year watching for possible mould growth in order to catch it and deal with it before it spreads.  This is an ongoing issue in many museums and requires extra diligence.  All objects must be quarantined when they are donated to the museum for a period of time usually one or two months.  They are examined regularly and only enter the permanent collection when they show no evidence of mould or insects.  In Nova Scotia (as in United Kingdom) where the average annual relative humidity (RH) is over 80% mould growth can happen at any time.  General collections of objects are best stored at 65% RH.

I put together a list of steps to take in terms of cleaning up this mould outbreak.  The steps are based on a combination of advice from the Senior Conservator at Nova Scotia Museum, internet research, and my studies at the university.  The objects were bagged in plastic and stored in a freezer then removed and kept in room temperature still bagged for at least 24 hours beforehand.  The following steps were discussed and approved by the curator before proceeding:
  1. hang up the objects on a line outside in direct sunlight preferably with a bit of wind for 6 to 8 hours - make sure that they are not hung up near intakes for air conditioning or open windows into the building
  2. brush off the objects with a soft, small paint brush first one direction and then the other - repeat this step after 2 or 3 hours - when done, brush must be soaked in bleach and water solution for at least 20 minutes, rinsed and dried OR thrown away
  3. mix Orvus soap (discussed in previous post) with distilled water in a small bowl using only one teaspoon or less of soap, thoroughly mix it
  4. using a natural sponge lightly damp wipe the object with the Orvus solution first one direction and then the other - sponge must be soaked in bleach and water solution for at least 20 minutes and dried when done OR thrown away
  5. using a natural sponge lightly damp wipe the object with distilled water first one direction and then the other
  6. repeat above step
  7. hang up the damp objects on a line outside in the sun for several hours until thoroughly dry (again, windy would be best
Note: latex gloves and a face mask were used for all steps where mould spores may be present. 

The objects in question were a collection of military hats primarily from World War II but of particular interest is one from the Boer War which is over 100 years old.  Below is a photograph of all of the objects.  Later photographs will show them in more detail.


Wednesday 17 October 2012

Roundhouse Objects Conservation - Oct. 16, 2012

October 16, 2012

Assessment Finished

 I completed the assessment of all the railway roundhouse objects and am preparing the spreadsheet with the information needed by the curator to discuss and approve the steps to proceed.  In general, the conservation will be basic cleaning, stabilization of most of the metals but not the very large ones, preparation of storage materials, and entering the data on the collections database.  More on this in a later BLOG.


The two photographs above show a group of objects that will not be conserved but will be given away to local railway history collectors.  The reasons for giving them away:
  1. they are considered not "historically significant",
  2. they are in considerably bad shape - lots of corrosion which is heavily flaking as seen in the photographs,
  3. they are in some cases duplicates of objects already in the museum's collection,
  4. they will save space in storage in a limited storage area (this is common in community museums).
In November 2012 the curator and I will travel to a nearby railway collector and offer these objects to them.  I am looking forward to this as part of my education on the history of the Dominion Atlantic Railway.  The history will help me fill out the historic records for these objects and becomes part of the body of work kept at the museum and stored electronically on the collections database.

The next step, beginning next week, is to start the conservation work.  This will mean cleaning all the objects using fine brushes, cloth, and soap for surface cleaning. Distilled water will be used for rinsing and for mixing with the soap.

Conservation Tip: Many objects can be washed or damp wiped with soaps that are pure in nature.  That is, do not have any other chemical additives such as dyes.  Orvus is an example of a synthetic, neutral, gentle, effective cleansing agent and is often used to wash or damp wipe or soak textiles of all kinds such as quilts but must be used carefully since some colour dyed materials have the potential to run.  Any coloured materials must be tested for colour fastness first before proceeding.  Usually I will soak a Q-tip in distilled water and rub it with moderate pressure on coloured material in an area not readily visible.  If any of the colour rubs off on the Q-tip I will not clean that coloured area.  Please check the Material Safety Data Sheet  (MSDS) of any cleansing product to determine safe handling and potential health issues before proceeding.  This web page has that information for Orvus and where to obtain it

http://www.pgpro.com/Default.aspx?tabid=88&product=93

Friday 12 October 2012

Roundhouse Objects Conservation - Oct. 9, 2012

October 9, 2012

Assessment (Continued.....)


Large locomotive wrench
I finished off assessing the large group of objects including this large wrench shown on the right which was used on locomotives.  The scale in the photograph (black and white bar at bottom centre) is 11 cm (about 4 inches) long which shows how large it is.  There are yellowish white pock marks on the wrench which are of unknown origin.
Heavily corroded padlock
There is a very corroded (rusted) padlock shown on the left that may have a makers mark that could be revealed by removing the loose layers of corrosion.    Once again, makers marks can help provide history of the object and date it.  The padlock is frozen in the position shown - it does not move when minimal pressure is applied.

There were two glass objects assessed: a clear glass lid for a compote jar and a glass insulator for a power line.  It is not clear if the glass lid was imported from elsewhere or made locally.  It may be possible to determine this when it is cleaned and compared to some similar objects currently in the museum's locally made glass collection.

Conservation Tip: For all metals I am proposing that I remove all loose rust and apply a fine layer of museum grade wax heated with a hair dryer and applied with a brush.  This will stabilize the object to avoid it deteriorating any further.  In the top photograph you can see some flecks of corrosion which come off when handled.  This would not happen if treated as I propose.  The coating of wax would block contact with moist air yet allow the object to be viewed.  The wax is easily removed by reheating with a hair dryer and wiped off with a clean cloth.  There were two other metal objects assessed at the same time: a brake wheel and three rail spikes.  All will require the same treatment.  Caution: Most metals expand when heated and contract when cooled so it is important to make sure that the metal objects are stable and can withstand a minor amount of heat such as with a hair dryer.


Tuesday 9 October 2012

Roundhouse Objects Conservation - Oct. 2, 2012

October 2, 2012

Assessment (Continued......)

Roundhouse Objects Large Group
Continued with the assessment of the large group of objects as shown on the left.  I am working in numerical order from the documentation provided by the environmental review company and mostly  from left to right in this photo.  I got through 12 objects which were mostly part of the tea serving sets used on the Dominion Atlantic Railway. As I work my way through these it is obvious that cleaning and proper storage will be most important.  Cleaning will provide the following benefits: preparation for storage, no more loss of material with handling, and uncover makers marks.  Storage is critically important to these objects because they are fragile and currently are only wrapped in thin white or brown paper and loosely placed in a large plastic box.  The objects do not roll around or knock against each other in the box, they are somewhat firmly packed in.

Conservation Tip: I will recommend that each object be wrapped in cotton batton and placed in a better box.  Both boxes and cotton batton can be easily and cheaply obtained at a local dollar store.  I would also recommend this for anyone at home who may have fragile objects stored away.  Although using acid free boxes for storage and the use of museum grade materials of all kinds would be better they are much more expensive.

Several of these pieces have makers marks which can be used to research the supplier.  It is this research that can shed light on the manufacture and usage of these which can also shed light on local customs.  Certainly, the more expensive the ceramics the more wealthy and the higher the social status of the client.  There are similarities in the makers marks in this collection but some variations.  Perhaps they were purchased at different times and may reflect change in ownership of the company that made them.  All appear to have been made in the United Kingdom.  Since the railway was in operation from the late 1890's until the 1960's there will be some supplier history available.  In the earlier years of operation a more wealthier client could afford to take the train from Yarmouth to Halifax and beyond while dining in the dining car and enjoying the view out the window of the beautiful Annapolis Valley.  Below is an example of a makers mark - Grindley England Vitrified supplied by Nerlich & Co - on a butter dish.  Nerlich & Co was an importer based in Toronto that was active from 1858 until at least the 1940's.

Butter Dish with makers mark


Tuesday 2 October 2012

Roundhouse Objects Conservation - Sep. 25, 2012

September 25, 2012

Assessment (Continued....)

Roundhouse Objects Large Group
This work continued from Day 1 with the larger group of objects as shown in the photo to the left: 28 in total consisting mostly of ceramics and glass.  The glass consists mainly of bottles of various shapes and sizes with many makers or company marks which will assist with identification and dating. The ceramics are mostly broken which suggests they were just thrown away.  Surface cleaning is suggested for all.  I managed to get through the assessment on half of them which have a lot of surface dirt (soil) and some red colouration on the ceramics.  This implies they were dug up from the soil which is predominantly red in the area where they were found.  I tried removing a very small speck of red on one of the ceramic pieces with a Q-tip and distilled water and it came right off with very little pressure.

Conservation Tip: I have made a note that the ceramic pieces could all be wiped off with distilled water and a cloth.  Distilled water is used to minimize contact with water of unknown mineral content.  Q-tips can be used to clean in some of the hard to get areas.  One of the benefits to cleaning is to minimise the amount of material that will rub off or fall off during handling and preserve it for future testing if needed.  All material removed when cleaned will be saved and stored with the objects to facilitate any possible future testing or analysis.  We can never be sure what may be important in the future, perhaps a 100 years from now?

The museum has a large collection of the ceramics (dishes) used by the Dominion Atlantic Railway during its "hey day" so only a minimal amount of clean-up work is necessary on these ceramics to make them presentable for a future exhibit and for storage.  For those interested in seeing the intact dishes including a full setting there are examples available for viewing at the Kings County museum.

There are three metal objects: a lock, three spikes, and a wheel which are very rusted.  These can be carefully cleaned and then a fine coat of conservation grade wax (much more pure) applied with a fine brush and a hair dryer to stabilise them.  The wax acts as a coating to prevent contact with moist air and is easily removable by reheating and wiping off with a cloth.

Here is a photograph of a broken ceramic piece that shows the dirt (soil) and rust patches:

Ceramic jar lid

Roundhouse Objects Conservation - Sep. 18, 2012

September 18, 2012

Purpose

The purpose of this exercise is to identify what conservation work can be done.  For all objects I identified:
  • what can be cleaned (inside and out) and with what tools, 
  • any consolidation (simple re-attachment or repairs) and stabilization (for metals, protecting from rust), prepare a label tag, 
  • identify any materials required for this work and if purchasing is necessary.  
In a later step there will be updates necessary to an online public database along with record photography with a light box and additional lighting.  The assessment information is presented to the curator for discussion and, later, a decision is made on what to proceed with.

Assessment

Roundhouse Objects Small Group
I started with the small group of objects as shown to the left and set up a short "production line" with all the objects uncovered and laid out on a large table.  One object at a time was carefully examined under a lamp.  Each object came with a page describing the condition, any known history, measurements, recorder name and company but nothing was recorded in terms of conservation needed.  I read each description and verified all the written information.  Any additional information will be added if needed.

An entry was posted in an Excel spreadsheet for each object identifying the following pieces of information:

Sequence number
Museum identification number: example - 2007.012.001
Short description: example - glass, bottle
Photograph: a simple quick, photo with a scale and automatic settings
Recorder: who recorded the initial information
Accession Date: date acquired by the museum
Curator
Condition: example - Poor: surface corrosion, crusted sand and dirt, unstable, dented
Conservation needed: example - surface cleaning with soft brush
Secondary Description: example - A similar object is already in the museum collection 2007.012.033

Here is a close-up photograph of one of the objects examined in this first group, a cigarette package (empty, of course):

Sweet Caporal Cigarette Package - sold in Canada for at least 125 years


Monday 1 October 2012

Roundhouse Objects Conservation

Railway Roundhouse Project

I will be working on a group of objects every Tuesday between 9 AM and 4 PM at the Kings County Museum in Kentville, Nova Scotia for the foreseeable future. The public is invited to drop in and ask questions or observe the conservation work as it progresses.  A body of information is supplied to the museum with all conservation decisions made by the curator based on the information provided.  This is the second group of objects I have worked on for the museum but the first that are being documented via a blog. Comments and questions are welcomed.

Background Information - Dominion Atlantic Railway Roundhouse Demolition
Full view from the east side
In 2007 the railway roundhouse as shown in the photo to the left was demolished in Kentville, Nova Scotia.  It had been used for many years by the Dominion Atlantic Railway starting in 1912 to do maintenance work on as many as 12 locomotives at once.  Many objects were uncovered in the former railway lands prior to the demolition and donated to the Kings County Museum in the fall of 2005.  They were documented by a Senior Environmental Specialist with the firm Neill & Gunter and became part of the Kings County Museum's permanent collection.  They arrived in three groups (boxes) with most objects wrapped in either white or brown paper labelled with a sequence number.  They are shown unwrapped and laid out in the photos below.  There was a separate box of metal items (not shown).  Overall, they consist of glass, ceramics, metals, and paper items.  

There are a few other, much larger objects that are not shown: some very large wrenches and a light on a metal pole.  Also, a set of locomotive wheels attached to an axle were moved from the round house site and installed in front of the museum.  These latter will not be conserved as part of this project.

 Large group of objects - 28 in total.

Small group of objects - 11 in total.

Time Capsule

Perhaps the most interesting was a "time capsule" dated 1938 which was a metal tin found in a piece of cement in the foundation.  These items are shown in the above photo at the top centre.  Inside this tin was a note listing the names of the seven people who did the foundation upgrade work in 1938 with a promise to pay $1.00 to whoever finds it and contacts a person on the list.  Since all of the people listed have since passed on it was decided that the demolition team should each receive a one dollar bill from 1938 as a reward.